Nexus 5x Trying to Dl Oreo Again
I of the fascinating things virtually Android is that it lets yous unleash your adventurous cocky. If you are just a basic or boilerplate user, you could explore millions of apps in the Play Store to make the near of your device. However, if you are fifty-fifty a fiddling passionate about the telephone or tablet you own and have rooted information technology, the possibilities are immense. Yous can try and experiment custom ROMs and mods that can exist easily plant effectually the web if Googled.
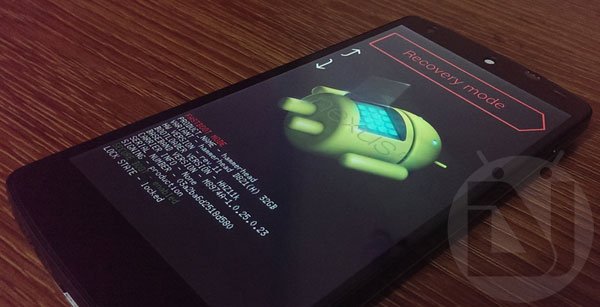
Rooting lets yous enjoy some really practiced apps and ROMs that help you get better bombardment life, the adequacy to tweak and optimize your device, and the option to customize your device in a plethora of ways. Every bit y'all know, any audacious feel involves the element of risks too. You might root your Android device, attempt a mod or kernel, or might become for a custom ROM, merely in that location might be certain situation when yous would either wish to return to the stock firmware of your device, or be forced to flash stock ROM as the ultimate resort to recover your device to normal state in example it is defenseless into bootloop.
The reason why I decided to write this tutorial is a little mishap that took identify yesterday when I was going to install a ROM. I copied the ROM and Gapps file to phone, backed up the old ROM, and and so while wiping information, cache, and organisation, I as well selected internal SD card. The upshot was catastrophic and it was by flashing the manufactory image back that I could recover my Nexus 5.
While non all Android OEMs provide stock firmware of their device for public download, there are a few like Google and Motorola who accept been pretty good at making them available to users. Then, if you own a Nexus 5 and wish to restore it to stock firmware by flashing the official factory image, you can follow our detailed tutorial beneath and do it within minutes. Though this guide is meant for Nexus five, it can be used on any Nexus device. The only of import thing is, you must take the appropriate epitome file.
Disclaimer
The process described beneath has been well tested just its success depends on how good you are while following information technology. The method is pretty easy to follow but it involves a few ADB and Fastboot commands.Read all steps a couple of times, make all preparations and do them carefully.
Preparations:
Restore Nexus 5 to Stock: The Steps
Having fabricated the required preparations and downloaded the correct factory image for your Nexus 5, you tin now continue to flash it. Here are the steps to restore Nexus five to stock firmware:
- Unzip the downloaded manufacturing plant image file with .tgz extension. Please annotation that downloaded with some browsers, the manufacturing plant image file is saved to your computer equally a .tar file. In that case, you should modify the file extension to .tgz and then that you might extract it.
- Open up the extracted factory prototype folder. You would find a zip file within. Unzip information technology too.
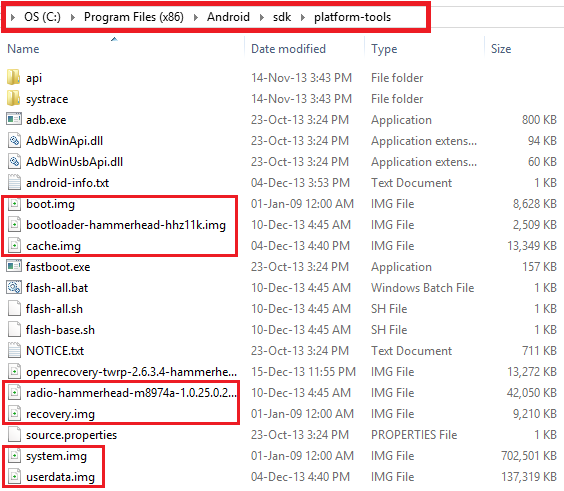
- Now copy all the contents of the image directory to the Platform-tools directory under C:/Program Files/Android/sdk .
- Also, copy the contents of the zip file to the aforementioned directory. See the screenshot below to get a clearer idea of the path of the files and also the image files that demand to be flashed using fastboot commands.
- Now it's time to turn off your device and boot it into Bootloader/Fastboot mode. You can do information technology past holding the Book Down+Power buttons for 2-3 seconds.
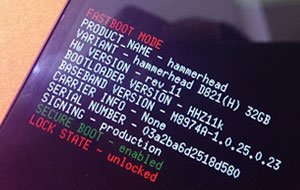
- Connect your Nexus v to the computer using a USB cable.
- Now open the platform-tools folder where you lot have copied the manufacturing plant image files and launch a command window. You tin do this past pressing the Shift+Right-click on the mouse at an empty space from within the platform-tools folder.
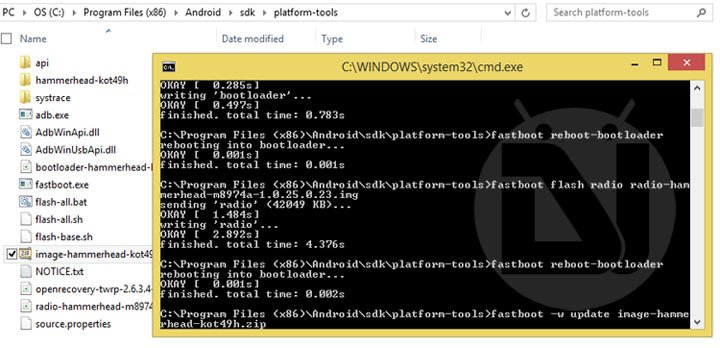
- It'south fourth dimension now to begin the flashing business. Commencement typing the post-obit commands i by one, allowing each to finish earlier moving onto the adjacent. If y'all are a Mac user, brand sure to add together ./ in front end of all commands (eg.- ./fastboot flash kicking kick.img ). Note: practice non forget to replace the file names highlighted in red to replace with the ones that you have downloaded.
fastboot flash bootloader bootloader-hammerhead-hhz11k.imgfastboot reboot-bootloader
fastboot wink radio radio-hammerhead-m8974a-one.0.25.0.23.imgfastboot reboot-bootloader
fastboot flash system system.imgfastboot reboot-bootloader
fastboot flash userdata userdata.imgfastboot flash recovery recovery.imgfastboot flash boot boot.imgfastboot erase cache
fastboot flash cache cache.img - When the Nexus 5 mill images are installed to your phone, it volition be on 100% stock firmware, like when you bought it. However, it'll still have unlocked the bootloader. If you want to lock the bootloader again, issue the following command:
fastboot oem lock
- If yous wish to proceed your Nexus 5 with an unlocked bootloader, skip Step 9 and press the Power button on phone when its screen shows Offset.
Virtually Nexus factory images come up with some flash scripts. By running them, yous can easily install all the required files to your phone in a single hit. Notwithstanding, we even so recommend that you use the fastboot command method given above. If you choose to use the flash scripts you can launch a command prompt window and issue the post-obit control:
- flash-all.bat(for Windows)
- ./flash-all.sh(for Mac)
I promise everything goes right for you. In instance you get stuck at a certain step or take a question, feel gratuitous to write a comment. Thank you!
Your 32GB Nexus 5 now shows only 16GB storage? Follow our tutorial to fix the result.
Reader Interactions
Source: https://www.droidviews.com/how-to-restoreunroot-nexus-5-by-flashing-factory-images/
0 Response to "Nexus 5x Trying to Dl Oreo Again"
Postar um comentário